
Deprecated
Initially you will need to check Destroy session on checkout in you domain settings and set the Confirmation URL to /checkouts?/.*/thank[_|-]you

You will then need to add a script to your Shopify store that runs when the customer completes the checkout.
Custom Pixel
Add a custom pixel to respond to the checkout_completed event.
1. Go to the Customer events page in your Shopify app settings https://admin.shopify.com/settings/customer_events

2. Click on Add custom pixel

3. Name the custom pixel, in this example we're calling it CH-Destroy-On-Checkout, and click Add pixel.

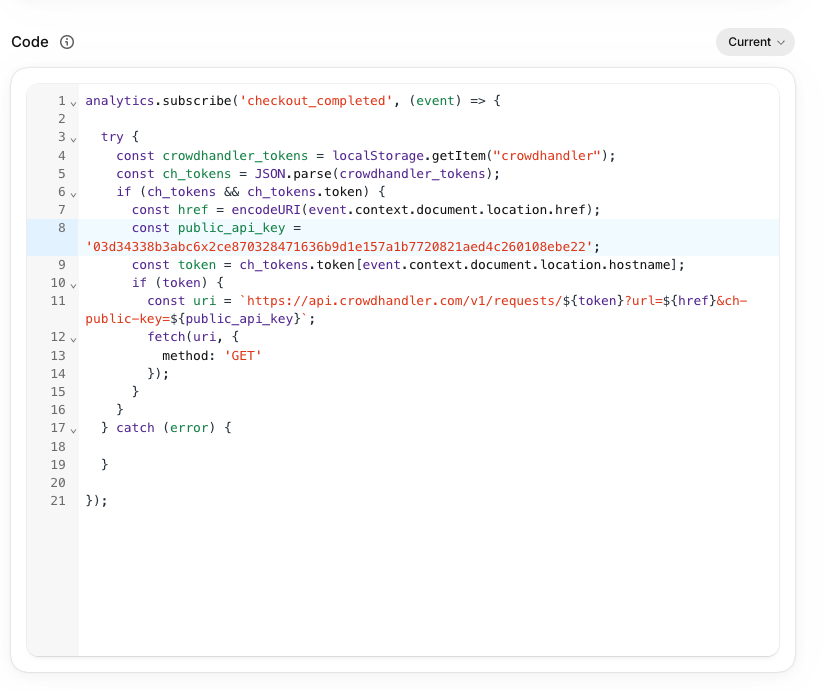
4. Copy the javascript below and paste it into the pixel code editor
analytics.subscribe('checkout_completed', (event) => {

  try {
    const crowdhandler_tokens = localStorage.getItem("crowdhandler");
    const ch_tokens = JSON.parse(crowdhandler_tokens);
    if (ch_tokens && ch_tokens.token) {
      const href = encodeURI(event.context.document.location.href);
      const public_api_key = '<CH_PUBLIC_KEY>';
      const token = ch_tokens.token[event.context.document.location.hostname];
      if (token) {
        const uri = `https://api.crowdhandler.com/v1/requests/${token}?url=${href}&ch-public-key=${public_api_key}`;
        fetch(uri, {
          method: 'GET'
        });
      }
    }
  } catch (error) {

  }

});
Replace <CH_PUBLIC_KEY> with your CrowdHandler Public API key. For example:
const public_api_key = '03d34338b3abc6x2ce870328471636b9d1e157a1b7720821aed4c260108ebe22'
It should look like this.
Ensure Permission is not required for this pixel.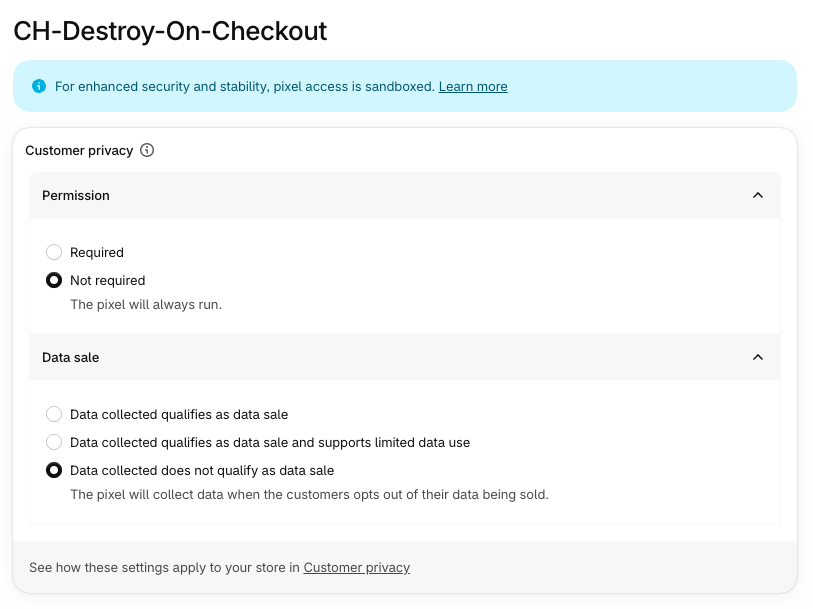
5. Click Save to save your custom pixel.
6. Click Connect to connect your custom pixel to your store.
